Wednesday 1 November 2017

DP studio Aysmmetric dress


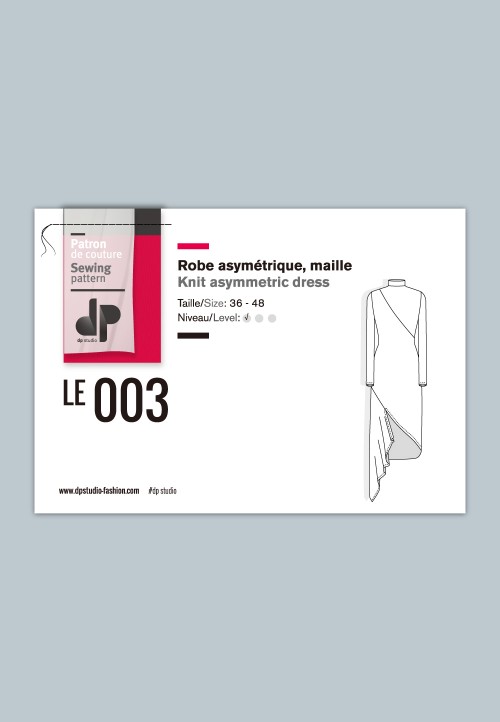
This make was inspired by fellow blogger Shauni, who blogs over at A Magnificent Thread, when I saw her version of this awesome asymmetric knit dress by DP studio. I'd never heard of this pattern company before but looked them up after seeing Shauni's post.

Shauni's version
They are a French company, but their patterns also come with English instructions, although the illustrations alone would have been enough to be able to make this dress, they are brief and do presuppose some sewing knowledge. My hubby bought me the pattern back in April and I've been on the lookout for some inexpensive fabric to make a wearable toile ever since. A couple of weeks ago I picked up a navy knitted rib. it was only 1m wide, so I bought 3m - which was more than enough and I might even scrape a top out of the remnant.


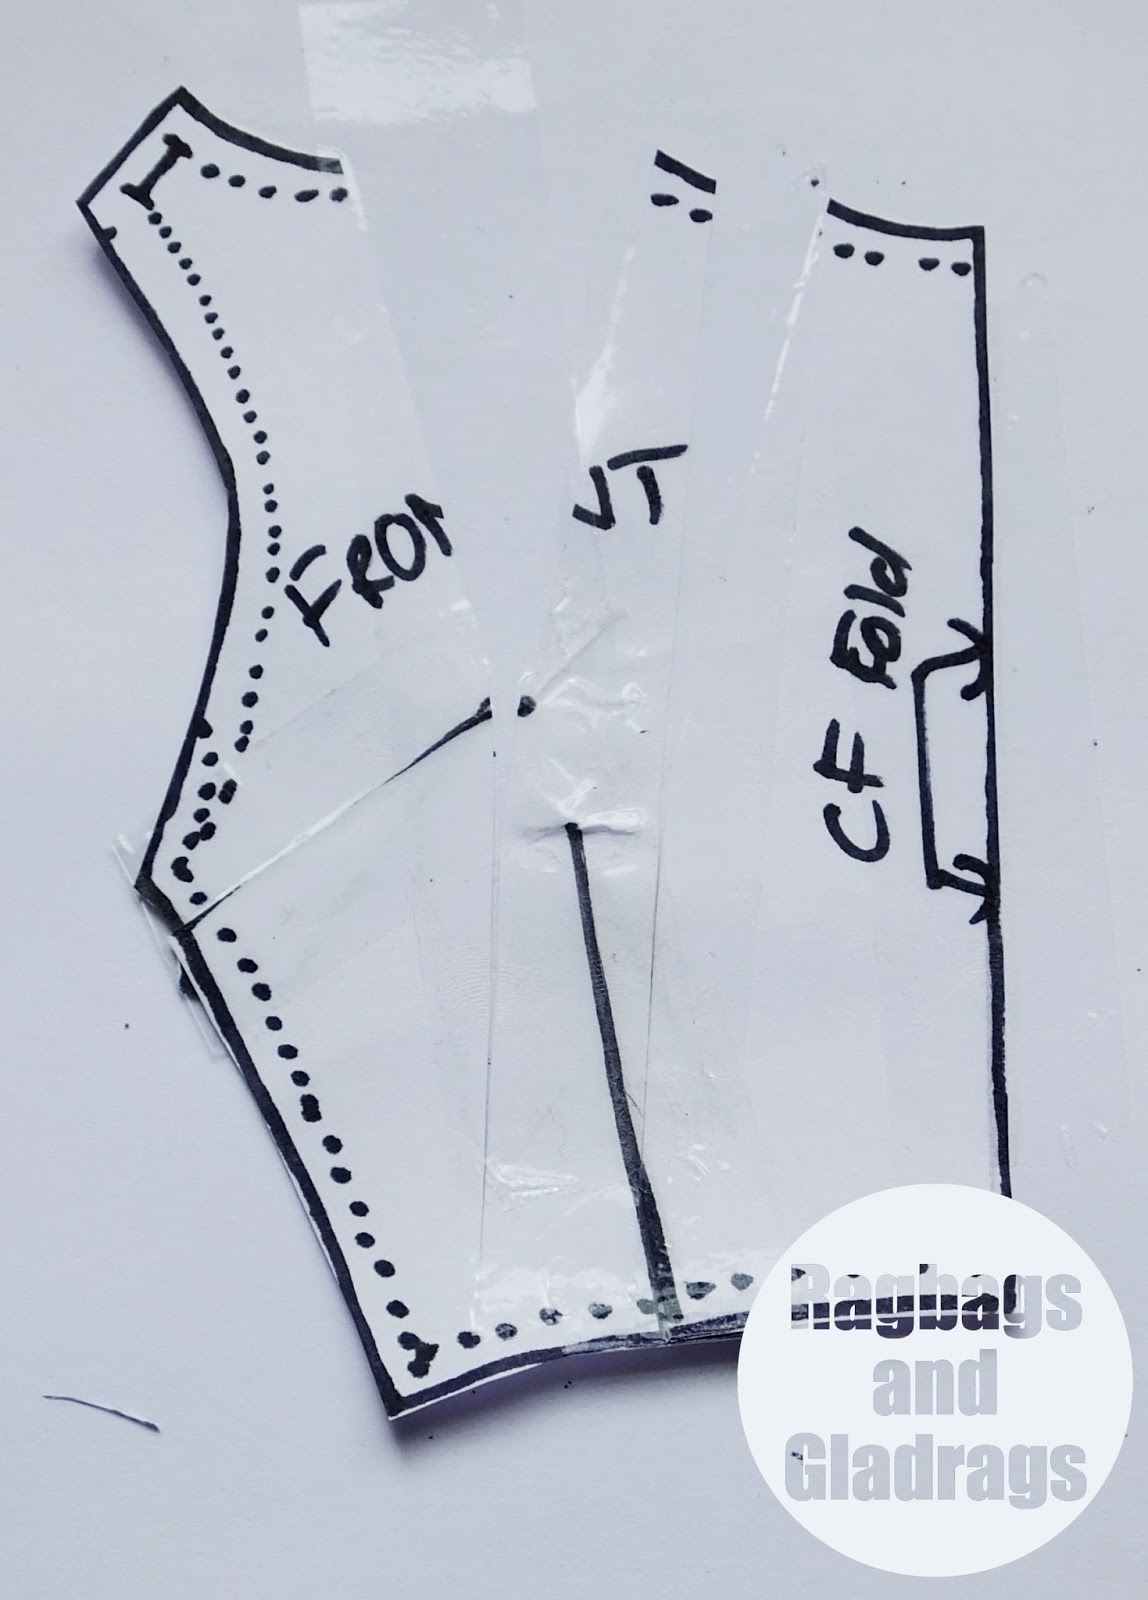
The pattern comes in an A4 sized box and is printed on thick sturdy paper. At first, I thought there were lots of pattern pieces but discovered that there are only 8, but they are BIG! as all pieces are cut from a single layer of fabric.


I bought some tissue paper and traced my size. Based on my measurements I cut a 40 for the top, grading to a 42 at the hip. The drafting on this pattern is excellent. I could take in the waist a little bit, but it's not overly big. What I am really impressed with, is the drafting at the shoulders and arms. A lot of patterns I have made recently have been way too narrow at the shoulder, and the armsyce has been really small (Gertie patterns). This was a pleasant change and I made no adjustments to these areas at all. the dress is a very comfy fit and I may use this as a baseline for all other knit patterns.


The dress came together easily and is suitable for a confident beginner to sew. An overlocker really does help and it would have been a super quick make, but I ended up using the overlock stitch on my regular Janome machine as my overlocker was playing up badly and I spent an age trying to get it to work. It really needs to go and be serviced. I also used the twin needle for hem and sleeve finishes - a first for me!

I found the fit great and had lots of compliments when I wore it today. I do think the split is a little high and I will probably add to the length at the hip to make this a bit more modest, The model version on the website seems to be much longer.


This would be a really stunning dress in a sparkly knit or scuba fabric. It would also work well in a Ponte de Roma fabric (and probably show fewer lumps and bumps). I can see this being a staple of my winter wardrobe and I might even use the top part of the pattern to make a couple of tops to wear with jeans or under my pinafore dress. 


Sunday 29 October 2017

Vintage Casual my way


Gertie Trousers. I've had the cigarette trousers from Gertie Sews VinatgeCasual on my radar to sew for some time. I traced the pattern ages ago but lost confidence after trying another pants pattern and having to start from scratch to get anything even close to wearable.
However, some super stretchy woven cotton made it way into my stash (birthday pressie from my mum). I decided to take another look at the pattern and thought I'd give it a go.
The pattern was remarkably close to my own draft - just a bit narrower on the hips, and since making jeans from my pattern in the summer I needed to reduce the width here anyway. However, I didn't want trousers with a back zip - it's just not me.


Changes to the pattern:-
I kept the silhouette the same but used the waistband facing as a template for the waistband.
The back waistband was kept the same, but as the front waistband is usually cut on the fold I added seam allowances and extra to account for the fly front. I also added 1.5cm seam allowance to the bottom edge of the facing pieces.
The front, back and pocket pieces were adapted by tracing the facing pieces and then adding 1.5 seam allowances to the top edge.
The fly front was added and I used the Ginger Jeans sew along method for sewing this. I'd found it really helpful when making my jeans in the summer.


All my changes meant that the pattern finished at the same point on the waist, but the design lines were altered a little. I should have made the pockets deeper really, but I think they'll be ok for this fabric.
The stretch in the fabric meant that these are super comfy and have a good recovery, they looked good all day when wearing them.


I would highly recommend using fabric with a good amount of stretch. It aids comfort and can help with minor fitting issues. I would lengthen these just a bit as I had to sew really tiny hems.

A great basic pattern and plenty of options for customising the design lines of this style.

Saturday 16 September 2017

Tilly & Gertie


Just before my summer holidays I made the Cleo pinafore dress by Tilly and the Buttons but had to order buckles as the ones I could get in the local shops were too big.
It's a perfect dress to wear in the autumn and winter as you can layer it, and on those last few summer days, a t-shirt looks brilliant.

I made this with charcoal denim which has a little bit of stretch. I had just about 1m left after making my first ever pair of jeans. I bought the fabric at B&M in Leeds at the Sew up North event back in June. I had the buttons in my stash.


I'd made a wearable muslin of this dress back in January in a thick green cord - but it's not really my type of fabric or colour. I graded up a size at the hip but found my first version tricky to get on due to the small waist. I'd decided that a zip or fastening at the side seam was needed. I drafted a button fly and used some of my jeans buttons. It makes getting this dress on so much easier.


I've also been working on a dress from Gertie's Ultimate Dress Book. I'm making the surplice dress with sleeves. I haven't decided which skirt pattern to use yet as I'm just at the muslin stage. (not great photos I'm afraid)


I'm so glad I made a muslin as there are a number of changes I need to make.


The armscye is tiny and needs lowering by about 1.5cm. The sleeve is also minute and I could see it would be an issue once I'd set it in. I had to cut it so I could move my arm.
The back is pretty much ok.


I need to widen the shoulders just a touch - I'm finding I have to do this a lot; especially with Gertie's patterns.
I need to lengthen the midriff pieces by about 1 inch at the front, grading to nothing at the back - that accounts for my swayback.


There are then a couple of adjustments to the bodice front. Pinching out along the neckline and removing some fullness - nothing too major. Then it will be on with muslin no.2.

Thursday 17 August 2017

You must try this dying technique - Amazing results!


Last week I was fortunate to take part in a local youth camp called Staying Alive. It's organised by the Church of England but brings together leaders and youth from a range of Christian backgrounds. I was helping lead a group but had also been asked to run an "EXTREME" craft workshop, as the theme was NO FEAR.

Now my mind ran to the most extreme crafts I could do with a bunch of teenagers - I could have started hacking at chunks of wood or brick or making extreme clay work - like raku firing. However, the safety and time limitations meant something a little tamer, but still amazing! So I opted for space tie dye. The results were sooooooo good that I thought I'd share my method here.


You will need:
Washing soda (soda crystals - without bleach)
Elastic bands or strong string
A bucket
Plastic bags
Procion dye in a range of colours (Dylon cold dye works well)
Bottles with a nozzle or Jars with lids and pipettes.
Pre-washed cotton fabric/ t shirts etc.
Gloves


1. Prepare the dye.
I like to do this in a jar and use pipettes to put the dye in the fabric (but you could do just as well with a squeezy bottle with a nozzle). Put about 1 tsp of dye in a jar and dissolve in a small amount of hot (but not boiling) water. Make your dye up to about 100-150ml.

2. Prepare the Soda solution.
Dissolve about 200g of the washing soda in about 1 litre of hot water, when dissolved add more cold water to about 2/3 litres.

3. Prepare the fabric.
Tie the fabric tightly with string or elastic bands. there are many ways you can tie fabric in order to dye it. It's worth experimenting with bands of colour, circles, spirals etc.There are some great ways to tie your fabric here. Once the fabric is tied you need to soak it in the soda solution until it's soaking wet. then wring out as much of the liquid as you can - you could use a spin cycle on the washing machine for this if you wish.


4. Dying the fabric
On a waterproof surface place your pre soaked fabric. using pipette add dye to the fabric. you can be quite random, or more planned in the layout of colours. you do need to think about colour theory. Harmonious colours will work best and you should avoid just using everything as you can end up with a mush!

5. Leave to dye
Once you have covered all of the fabric with dye. pop it into a plastic bag and leave for at least an hour or overnight.

6. Rinse
Rinse the fabric in cold water to get rid of the excess dye. Then remove the bands/ string and rinse again. It's worth rinsing in warm water and spinning before hanging up to dry.

7. Admire
Admire your EXTREME tie dye. The results are super and impressive - and anyone can do this!
Remember when you first wash your tie dyed items to wash them separately as there can still be
some excess dye.


Monday 7 August 2017

How to hack a basic bodice into a halter style top - tutorial

A few people have asked how I created the bodice for my maxi halter dress. - it's relatively easy.

You will need:
A basic bodice pattern.
Scissors
Tape
Paper
ruler/ french curve.

I used the basic bodice from Gertie's ultimate dress book but any basic bodice will do. Make sure it fits you well before beginning -make a toile.

I have drawn out the steps on regular paper with sharpie as you could not see the changes to my actual pattern as I'd used a thin light pencil and tissue paper. However the steps below should give you the right idea.

1. Trace your basic block, front and back onto the paper you are going to use and mark in the seam lines. I would also measure the neck edge before you start adapting the pattern. If you are going to make a collar piece this will make this step easier. (you could also apply a bias binding to the finished edge.


2. On the shoulder seams mark your new seam length. I made mine 1.5cm. Don't forget to allow for seam allowance on the neck edge.


3. Draw new cut away armhole to your new marked seams from the underarm.


4. Add seam allowance (1-1.5cm)


5. Cut away the excess paper from the shoulder area. The back piece should be finished now.


6. On the front cut up one leg of each dart.


7. Tape the darts closed. You will end up with a curved or pointy piece of paper. (you can also do this with patterns that only have one dart. the principle is the same)


8. Cut a straight line from the neck edge through the point of the bust dart, and one through the waist dart. The closer you are to the dart point the flatter your paper will lie.


9. Tape paper behind your pattern, spreading the neckline edge open - it will look quite wide.


10. Join the neck edge seam line with a smooth curve from the shoulder to the centre front - use a french curve to help - then add your seam allowance.


11. This is the edge that will be gathered into the collar or neck binding. My collar piece was approx 22cm (folded in half) before I added the seam allowances.
To gather the neckline either sew two rows of basting stitched into the seam allowances and pull the ends of the thread up to ease into the collar or sew a zigzag over dental floss or cord and pull that up to gather the neckline.

Order of construction:
Sew darts in back bodice and press towards centre back. Sew shoulder and side seams together, press. Gather neckline and sew into collar. Sew collar facing and finish CB seam. Buttons, a tie, or zip work well.

Sunday 6 August 2017

Maxi Halter Hack


Since getting into sewing 6 years ago I have always been inspired by Gertie and her love of fabrics and pattern adaptations. When I saw this fabric I originally thought it might make a Gertie style Tiki dress. but the fabric lacked the body needed for such a dress. I had bought this fab fabric from B&M fabrics in Leeds. I visited the shop as part of the #sewupnorth event. Once I had realised it would not make a tiki dress I had several other ideas for this fabric. I was going to make a version of my Alexandra dress, but wanted a maxi length and knew there would not be enough to add the ruffles and a long skirt. Then I was going to make the surplice dress from Gertie's Ultimate dress book but again that design requires fabric with more body.


In the end I decided to adapt a basic bodice as I wanted to get the most out of the drape of this fabric.
I took the basic bodice from the Ultimate dress book and cut away most of the shoulder area and closed the bust and waist darts, rotating the fullness to the front neck edge.


I drafted a collar piece. this started as a straight piece, but then I took out wedges along the top to give a curved finish, making sure I marked the shoulder line.

I sewed the back darts as normal and the shortened shoulder seams then gathered the front neckline into the collar. The armholes are finished with a bias facing.


The skirt is essentially the Pencil Skirt from Gertie's new book for better sewing. I used my usual size 6, but had to take in quite a bit at the waist to fit the top. In fact due to the drapey nature of the fabric and lack of lining I ended up taking almost an inch from the side seams of the bodice as the gaped quite a bit.

I added a concealed zip, which finished mid back and two buttons on the collar. A walking slit allows ease of movement. I think this just might get a lot of wear on my holidays.

Friday 4 August 2017

My First Pair of Trousers


I did it - I made trousers and they are wearable!
Way back in the early part of the year I make a muslin of trousers from Burdastyle magazine. They did not fit! Way way too tight,  and the back rise and crotch curve were just wrong.

So I set out on drafting and making my own. I like the high waist cigarette pants from Gertie's book, but was not sure that they would be any better as I'm pear shaped, have along torso and fairly chunky legs - years of skating and dancing have left me with well developed thighs and over extended calf muscles.


My initial draft was OK, but there was lots of excess fabric in the back leg. The waist was also too low and too wide.


Changes made were: Raise the back by adding a wedge into the CB seam; lengthen the back Crotch seam and scoop out more. scoop out the front crotch seam a little; Narrow the legs and then take a wedge out from under the butt. I also found the fabric was catching on my calf muscles so I made a extended calf adjustment on the back pattern piece and finally drafted a curved waistband. I also made the back pockets a bit bigger than the original draft.

I used the Ginger Jeans sew a long to help with the construction order and found it very helpful. I added stable cotton for the pocket linings and tacked to the front seam. Top stitching was done in self coloured thread. The fabric behaved beautifully. I bought 2m at B&M fabrics in Leeds at the #sewupnorth event in June. I had enough left over the make a version of the Cleo dungarees dress by Tilly & the Buttons.


These trousers are completely wearable, but they are not perfect.


This was my first time sewing with a stretch woven and I'm a convert - the comfort and stability of the fabric was brilliant.

So verdict - I'm really happy with these for my first pair of trousers. I will make some adjustments for the next pair. I wore these for 2 days and the fit was great to start, but as with all denim, it slackens off when you wear it. I was really happy with the back waistband and the fit at the back - it's the first time I've had trousers that don't gape!

Adjustments for next time:-
Lengthen the legs slightly - about 3cm and add more hem
Taper the back leg at the hem, below the calf - I'm sewing with stretch there is no need for flappy hems!
Take a small wedge out of the back inseam under the butt - just to help with those wrinkles.
Take a pinch out of the front at the pocket edge to make them lie flat.
Take a small wedge amount out of the front crotch seam and check the curve.
Pinch out excess on the front waist seam to abdomen (where you would put a dart) as this is where I found the draft gaped quite a bit and I found myself pulling them up a lot, especially on the second day of wear. I do want to keep the comfort and not make them too tight.

Sunday 30 July 2017

The Alexandra Dress - Re-issued FREE pattern


 A few years ago I attempted to do some pattern drafting and grading.

I had very little knowledge but a desire to try something new. I'd drafted a pattern and decided that I would try digitising it and grading. I used Inkscape - which is free and I found it OK to use. I've since discovered a love for Adobe Illustrator and did an online course earlier this year.

I published my Alexandra dress online and it was available on the sidebar of my blog. However a blog revamp saw me remove the link and I never got around to redoing it.

I really should revisit the pattern, but the format I drafted it in isn't compatible with Ai, so I decided to leave it as is. I've recently had a couple of emails from people who wanted to sew the pattern and I just sent it to them.  Murielle recently sent me a couple of photos of the versions that she has made and is keen to make more. she has given me permission to share her images on the blog.


She has made a couple of versions for friends and I think they look stunning.


I'm aware that this pattern may not be perfect, but Murielle was happy with the drafting and found it easy to sew. You might also want to have a go - after all it's a free pattern and it's certainly something summery (although I often wear one of my versions with leggings and a cardy in winter). Get the pattern Here.

If you do have a go - tag your make #alexandradresspattern on social media.

Sunday 23 July 2017

My blog posts are like buses, non for ages...


Siouxsie Sioux make up practise
...and then this, and plans for more!
I last posted at the beginning of June and have every intention of writing at least one post a week, but life got the better of me. It's been a super busy couple of months. In fact, this year seems to have been the busiest summer term i've had in years!

It has been non stop! I was determined to make Pilates a regular thing on a tuesday eveing, but even that hasn't happened as I've had all sorts of work/ family and church commitments since the end of May and I haven't been at all. I really do need to get into shape and I think I might have to resort to my trusty fitness DVD's, I have a pilates one and a workout one, but they haven't had much use over the last couple of years.

The last 8 weeks have been full of good stuff. My hubby did some much needed work on the house at half term and me and the kids were his helpers - moving furniture etc. we still have a little bit of plaster work to tidy up, but that will get done over the holidays.


My Hubby and I went to his end of term college party in early June - it was 80's themed. He went as Morrisey and I went as Siouxsie Sioux. That was a lot of fun!


I joined the throngs of sewists up in Leeds at  Sew Up North - it was a great day and I came away with some great patterns and fabrics - and I won a prize in the raffle. I've also been running a Crafternoon once a month on a Saturday, in the school where the Church I'm part of meet. Through it I'm getting back into the crocheting!


I've also been on a school residential to a PGL centre with year 5 & 6; did the scenery for the school production, with the help of art club; written loads of risk assessments for our school trip to London next term. Had visitors over and made art; Joined in Northern Baptist College's community day at the start of July... and that is only half of it.


I have been sewing, but it's been just a few minutes at a time. I made a halter top from some fab red gingham I got at the fabric swap at sew up north. I used simplicity 1365 view c. It's not a bad piece, but I probably needed to make a couple more adjustments. I was going to include bra cups but decided against it as they didn't really fit the shape of the pattern too well. It is a very cropped top and I was concerned that as the fabric has some stretch it would roll up on the sides, so I added some plastic boning at the side seams just to help keep a smooth line - it seems to work.


A couple of months ago I drafted my own trousers as I wanted some cigarette pants. I started with a pattern from burdastyle, but the fit on me was so way out I couldn't use it. I have large hip to waist ratio (big butt) with about 13inch difference so drafting from scratch really has helped. I used the hack from Gerties sews vintage casual to make shorts. I made the inseam longer as I don't really like very short shorts these days!

I decided to make these up as a wearable muslin in brown linen - also scored from sew up north! The fit seems to be pretty good, but I need to take a small wedge of fabric out at the CB (swayback) I wanted to check my waistband draft was ok but think that is a bit to deep at 6 cm (this also adds to the sway back issue.) When I make the trousers I'll redraft to about 3/ 3.5cm waistband. I've bought some charcoal denim with a bit of stretch and the trousers are one of my next projects.
If you've drafted your own jeans is it worth putting in a back yoke? I'm going for slant front pockets and back patch pockets?
Photos of the finished items to follow!


LinkWithin

Related Posts Plugin for WordPress, Blogger...